the site
NewsAbout Stefan
3D section
PoserPixels:3D
Cinema4D
Misc
Music ProjectsSoftware
iBook
The Probelight node
First of all - this tutorial is for Poser 5 SR/3 Windows. Sorry, Poser 5 for the Mac does not have the probelight node.
important note: I am using a German operating system, which is why there is a comma instead of a point as a decimal separator in my screenshots. If you are on an English operating system, you will need to use a dot instead.
So, what does the Probelight do anyway? It's recreating complex light environments from just a few numbers, and it's doing that very fast. The downside is that it doesn't respond to shadows - or any other light in the scene, for that matter.
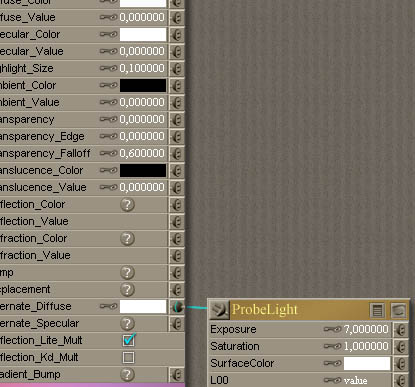
Now let's get started. Remove all the lights in your scene - all of them. Starting with a simple example, create a ball prop and switch to the Material Room. In the Material Room, select the ball's material and create a ProbeLight node (find it in the diffuse category - if it's not there, you're not running P5/SR3) and plug its output in the alternate_diffuse channel. Set both Diffuse_Value and Specular_Value to 0. The default values in the Probelight node are a little dark, so set the Exposure to 7. Hit "render" if you're curious about the outcome.
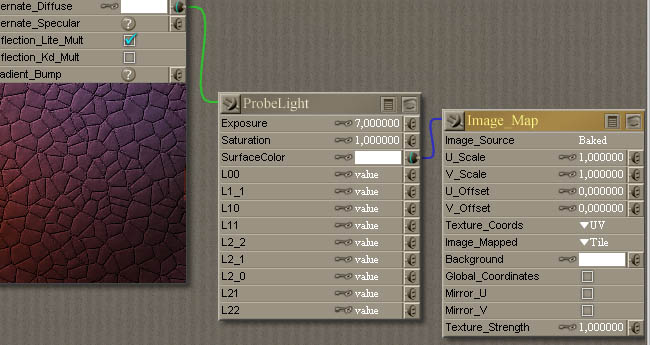
Pretty good for zero lights, right? But a little boring let's see how it reacts to variations. Try adding some texturing to it: Create an image_map node and plug it in the ProbeLight's SurfaceColor. Load a texture - in my example, I'm using Baked.jpg from Poser 5/Runtime/Textures/Poser 5 Textures/Hmann-Textures. Try rendering - yes, so this one works with textures too. Nice. I'll leave the Bump and Displacement channels as an excercise for the reader ;)
So far so good. But you're still not satisfied, you never are - right? OK, some more information: The Exposure control simply determines the overall brightness. The saturation parameter, suprise surprise, controls the color saturation of the probelight node. If you don't like that red/violet hue, set the saturation to 0.
But what do the other values do? If you tried clicking one of the Lxx parameters, they turn up strange numbers that have even more strange results when you change them. What are you supposed to fill in there? Well, for one you could read the PDF paper at the bottom of this web page and try some of the sample values in there. Next, you could compile the C source code from that page, create your own float probes and let it calculate the values. Or you could take the easy route - download the compiled program from here and get some float probes from debevec.org.
Let's try an example: Download the kitchen probe and the compiled program and unzip both of them to the same directory. Then open a command line window (hey, did I ever say it's easy?). In that command line window, change to the directory where the files are and run the program on the probefile like this:
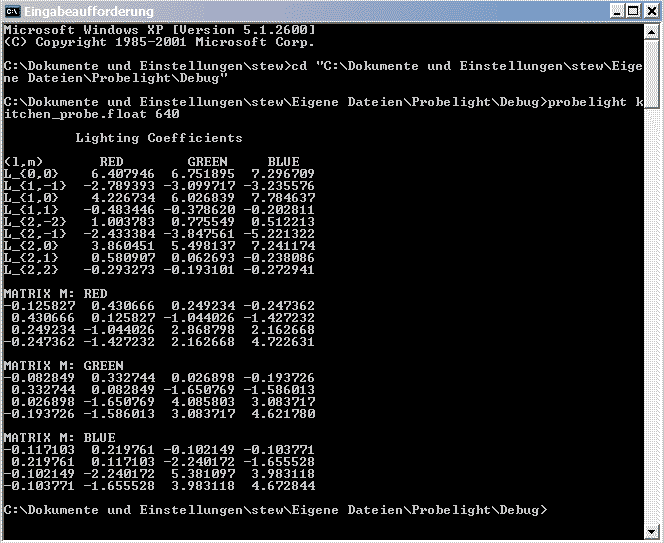
Where does the 640 come from? 640 is the size that was given on the site where you could download the probe. This number is important, so whenever you download a float probe, look for the size of it.
Now take a look that the Lighting Coefficients: These are groups of three numbers, named with L_x.x, just like the parameters in Poser's Probelight node. Yes, these are the values you want to enter to the probelight node. A tip: If you click the icon in the upper left of the command line's title bar, you find commands to mark and copy parts of the text, which you can then past with ctrl-V into Poser's parameter fields.
Hm...it turns out all white, doesn't it? That's because the numbers are very high, so turn down the exposure to 0.1. Now, hit render again...ahh!! In order to avoid the procedure of typing all these numbers again and again, save the material to the library.
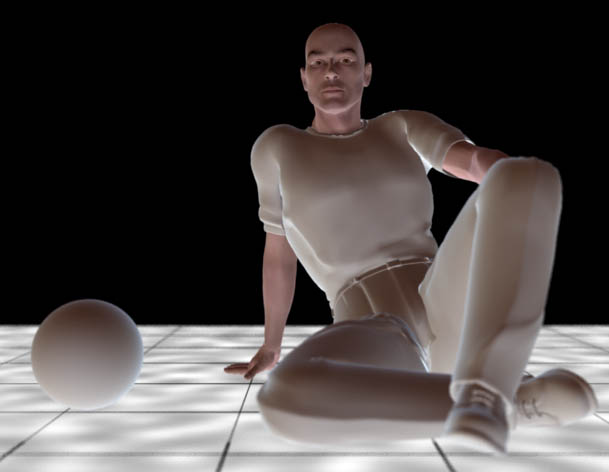
If you now apply that material to something more complex than just the ball, you can get decent-looking images without any light sources! The lack of shadows is a drawback, but you could compensate the glowing in the corners (like the armpits in this image) by darkening the textures in that areas.